
Tools, Safety, and Deck Preparation: How Are Metal Roofs Installed Correctly?
Metal roofs are installed by preparing a sound deck, applying compatible underlayment, fastening panels square from eave to ridge, and finishing with properly sequenced flashings. Before lifting a single sheet of metal onto a roof, safety standards must be established. Whether managing the job yourself or hiring expert Texas roofing contractors, installing panels on steep pitches requires compliant safety gear according to OSHA fall protection guidelines: personal harness setups, tie-off points, and secure scaffolding. For homeowners who want a warrantied system instead of a DIY install, professional metal roofing installation services ensure panel layout, fastening, trim, and ventilation are installed as one integrated roof assembly. Always store metal panels off the ground on flat, stable supports, keeping them covered and dry to prevent moisture trapping between stacked sheets before installation. Handle raw panels wearing protective gloves, as cut metal edges act like razor blades.
Understanding how are metal roofs installed starts at the substrate. We perform a full roof deck inspection to identify soft spots, delamination, or structural rot, replacing compromised OSB or plywood sheathing immediately. Substrate requirements vary depending on the panel type and pitch:
- Minimum Slope Requirements: Structural metal panels function at slopes as low as 1/4:12 (1.2°), whereas non-structural panels typically require at least a 3:12 pitch.
- Exposed Fastener Panels: Require a 1:12 minimum slope threshold, though they perform significantly better at 3:12 or higher.
- Purlins vs. Solid Sheathing: Exposed fastener panels often mount over structural open framing with purlin spacing between 24 and 36 inches on center, provided fasteners achieve at least 3/4-inch wood penetration using non-corrosive fasteners.
If you are evaluating your overall system health before starting, review our Metal Roof Installation Complete Guide to confirm deck readiness.
Selecting Underlayment and Substrate Materials
Underlayment is the secondary water-control layer beneath a metal roof, and it must be compatible with heat, slope, panel movement, and local climate. While traditional organic felt paper was standard for decades, modern metal roof design demands high-performance synthetic underlayment or self-adhering membranes. Manufacturer resources from GAF and Owens Corning consistently reinforce the same principle: roof assemblies perform best when the deck, underlayment, ventilation, and flashing are treated as a complete system rather than separate products.
- Synthetic Underlayment: Lightweight, tear-resistant, and ideal for standard slopes. It acts as an effective vapor barrier while allowing smooth thermal movement beneath panels.
- Self-Adhering High-Temperature Shield: Recommended for low slopes, roof valleys, eaves, and transition zones. High-temperature peel-and-stick underlayments resist the high heat generated underneath dark metal panels without melting or breaking down.
- Condensation Control and Ice Dam Protection: In climates subject to severe temperature swings, moisture forms underneath metal panels due to vapor pressure differences. Properly installed underlayment paired with continuous ridge venting stops moisture condensation before it can rot framing members.
Proper edge detailing is essential during underlayment installation. If your roof has aging trim, storm damage, or moisture intrusion before the metal system is installed, schedule a professional assessment through our roofing services before covering the problem with new panels. Check out A Complete Guide To Aluminum Drip Edge Installation for exact underlayment and drip edge layering steps.
Step-by-Step Guide: How Are Metal Roofs Installed from Eave to Ridge
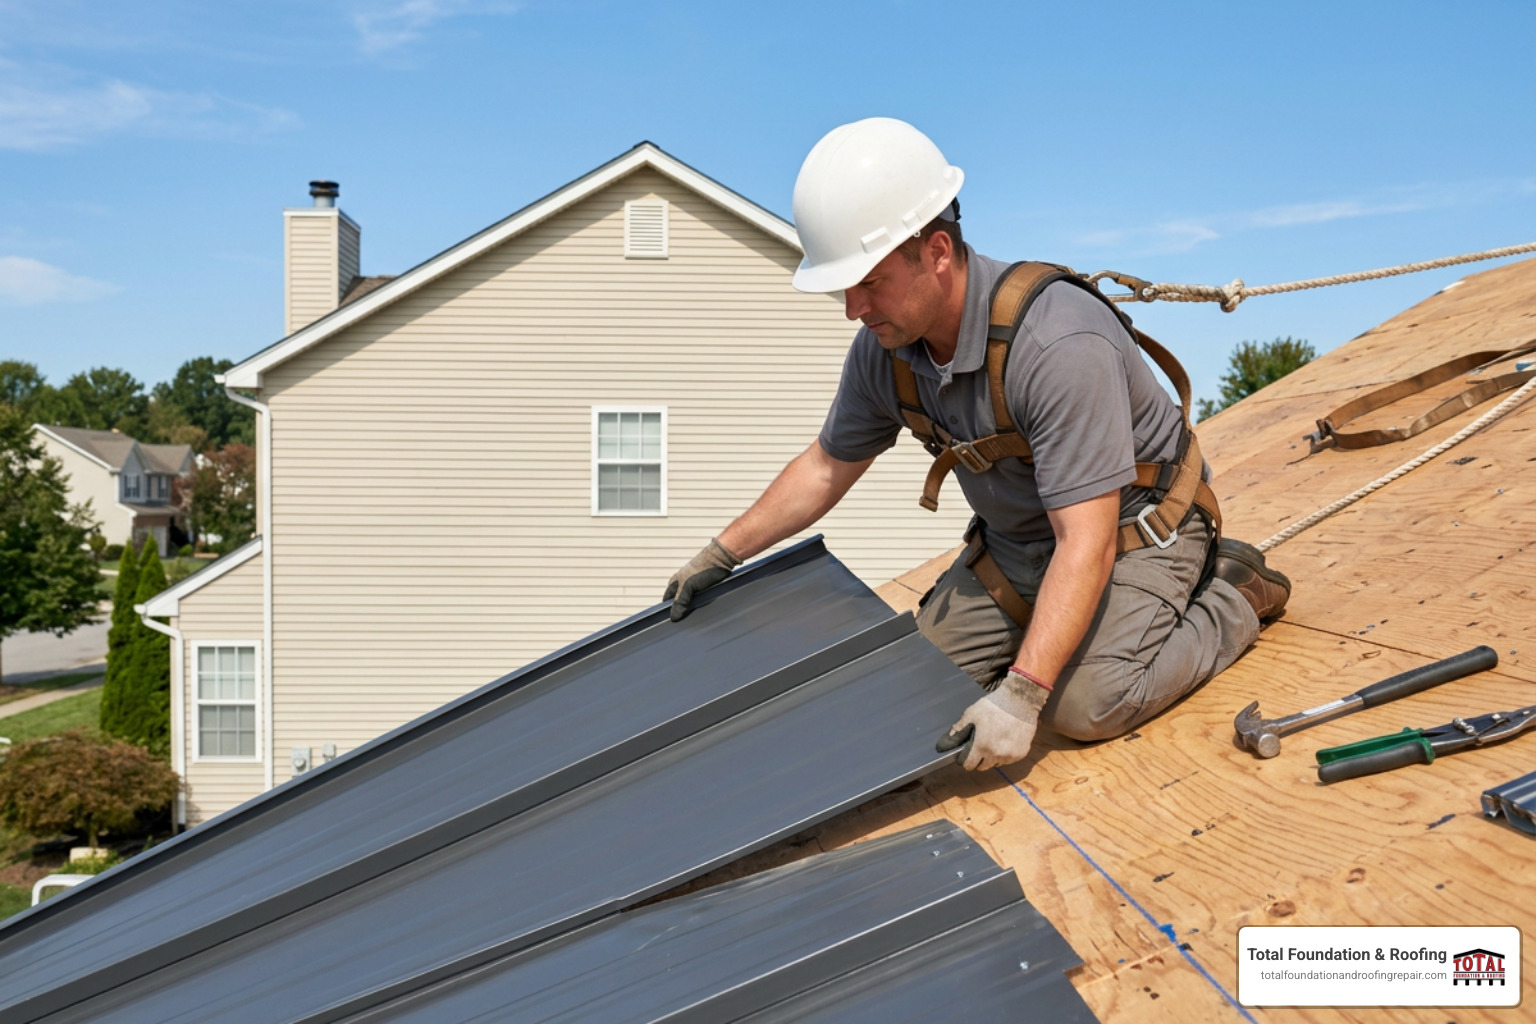
Metal roof panels are installed from a squared starting line at the eave, then fastened upward toward the ridge while overlaps face away from prevailing wind. When putting panels on a building, timing and geometry govern success. To understand how are metal roofs installed without binding or crooked lines, installers establish a true square starting line. Roof edges are rarely perfectly square, so relying solely on the fascia or rake line guarantees alignment headaches down the line.
We use the 3-4-5 geometry method (or larger multiples like 21-28-35 for large roof slopes) to snap a perpendicular chalk reference line straight up from the eave to the ridge cap. Panels are positioned starting at the gable end opposite the prevailing wind direction. This orientation prevents wind-driven rain from blowing underneath the vertical panel overlaps. Maintain a 1-to-2-inch eave overhang past the edge profile to ensure water drops cleanly into gutters.
For specialized advice on managing complex roof profiles, read The Pro Guide To Installing Metal Roofs Like A Boss. Homeowners comparing DIY installation with a crew-installed roof can also review our professional metal roofing services to understand when concealed fasteners, long panels, steep slopes, or complex flashing details justify expert installation.
Layout and Fastening: How Are Metal Roofs Installed Without Alignment Issues?
Fastening metal panels requires strict torque control. Drive hex-head screws with integrated EPDM neoprene rubber washers perpendicular to the metal surface. Tighten each fastener until the neoprene washer compresses level with the screw head rim—do not overtighten to where the washer mushroom-flares outward or dimples the panel face.
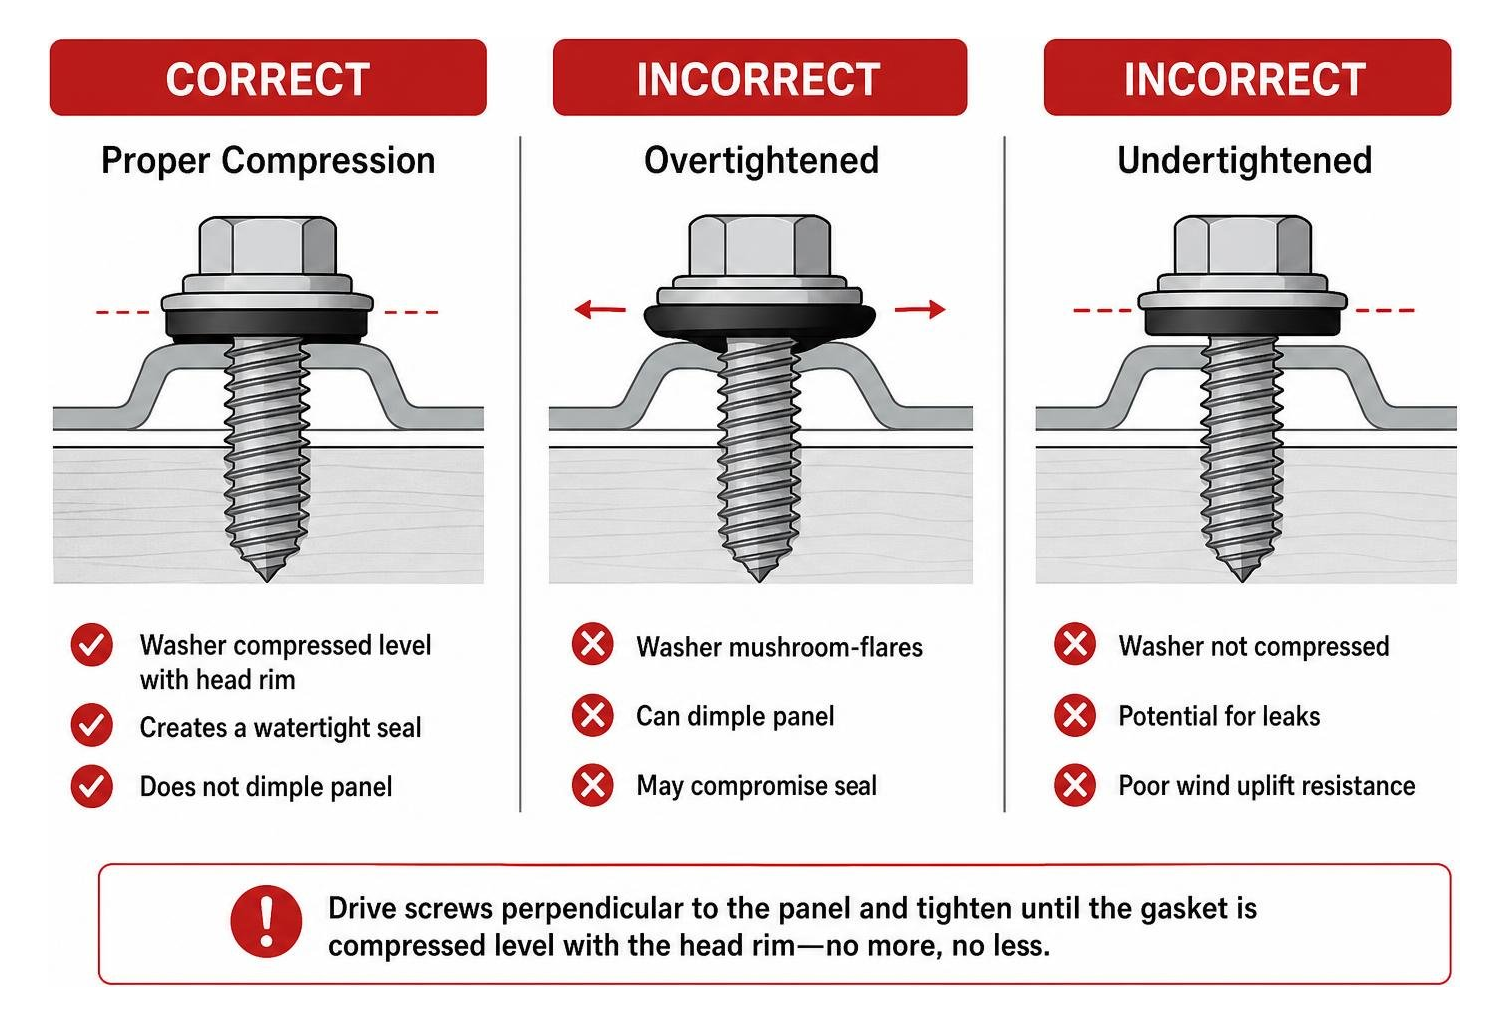
Fastener spacing generally ranges from 12 to 24 inches on center along the panel ribs or purlins, depending on local wind uplift zone requirements. The most repeatable installation rule is simple: one crooked starter panel creates a visible roof-wide alignment error, while one overdriven screw creates a future leak point.
| Feature / Specification | Exposed Fastener Panels (e.g., Tuff-Rib, PBR) | Standing Seam Panels (Snap-Lock / Mechanical) |
|---|---|---|
| Fastener Style | Exposed self-drilling hex screws with washers | Concealed clips and screws beneath seams |
| Minimum Roof Slope | 1:12 (3:12 recommended) | 3:12 (Snap-Lock); 1:12 or less (Mechanical) |
| Substrate Type | Solid decking or open purlins (24″–36″ spacing) | Solid OSB/Plywood sheathing |
| Thermal Expansion Management | Handled through oversized screw holes | Handled through sliding clip movement |
| Labor & Skill Level | Moderate / DIY Friendly | Advanced / Special Tools Required |
| Upfront System Cost | Budget-Friendly | Premium Investment |
If you are working with corrugated panel profiles, see our detailed walkthrough: A Step By Step Guide To Fitting Corrugated Roof Sheets. For Texas-specific licensing, ethics, and contractor education context, the Roofing Contractors Association of Texas is a useful industry resource for homeowners vetting roofing professionals.
Standing Seam vs Exposed Fastener Panels
Understanding panel architecture highlights why installation methods differ across metal roofing styles.
- Exposed Fastener Systems: Use screw fasteners driven through the exterior face of the panel into the roof deck. They represent a cost-effective, durable choice, but require washer inspection every decade.
- Snap-Lock Standing Seam: Features raised interlocking seams that snap together over hidden clips. Fasteners are completely concealed from weather exposure.
- Mechanically Seamed Standing Seam: Uses a mechanical seaming tool to bend vertical panel legs together (single or double lock). This system offers high weather resistance on very low-slope applications down to 1/2:12.
For a full cost breakdown of materials and labor differences, consult How Much Does A Standing Seam Metal Roof Actually Cost as well as local market data like regional metal roofing cost insights.
Trim, Flashing, and Managing Thermal Expansion
A metal roof’s leak prevention system lies in its trim sequencing. Installing flashings in the wrong order causes water to run behind metal sheets.
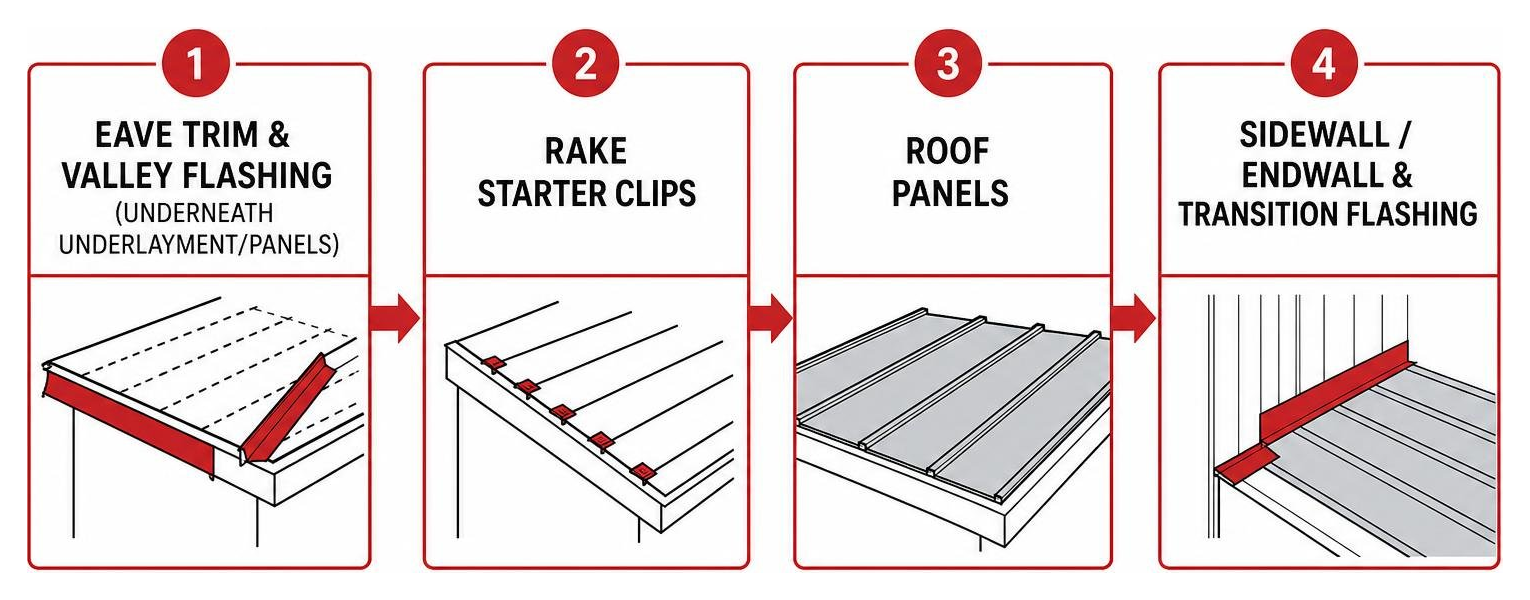
The strict order for trim installation is:
- Eave Trim & Valley Flashing (underneath underlayment/panels)
- Rake Starter Clips
- Roof Panels
- Sidewall / Endwall & Transition Flashing
- Rake Cap / Gable Trim
- Ridge Cap & Venting Closures
Metal expands and contracts significantly as heat fluctuates throughout Texas days. Long panels (over 20–30 feet) can shift by over 1/2 inch. Standing seam roofs manage this through slotted expansion clips that allow panels to slide freely. For exposed fastener systems, pre-drilling slightly oversized screw holes allows structural movement without shearing off screw heads.
When connecting panel sections to walls or roof hips, follow our guide on Installing Metal Roof Transition Flashing.
Final Inspection, Callback Prevention, and Expert Advice
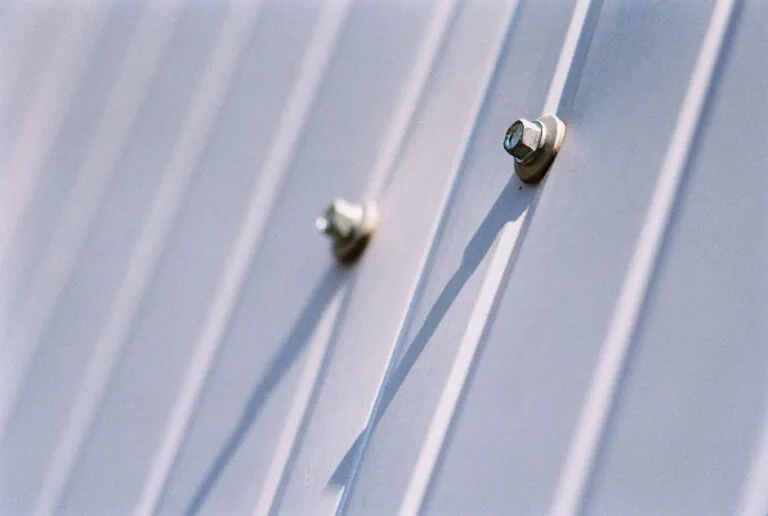
A metal roof installation is not complete until fasteners, flashing, sealants, ventilation, and cleanup are inspected as a single weatherproofing system. Once panel installation is complete, performing a systematic cleanup and quality check protects your warranty:
- Post-Installation Inspection Checkpoints:
- Remove factory protective film from panels within 45 days of installation; sun exposure can bake film onto paint permanently.
- Clean away all metal swarf, steel drill shavings, and cut burrs immediately using a soft brush. Leftover metal particles rust quickly, causing cosmetic surface rust spots.
- Verify every screw washer is compressed properly without under- or over-tightening.
- Inspect sealants around vent pipe boots, chimney flashings, and sidewalls.
Our field quality-control priority list ranks the most common preventable metal-roof issues in this order: mis-sequenced flashing, overdriven fasteners, poor panel squareness, inadequate ventilation, and unremoved metal shavings. That sequence is useful because it focuses inspection time on the defects most likely to create leaks, callbacks, or cosmetic corrosion.
While straightforward, metal roof installations demand rigorous attention to detail. In the Texas Hill Country—including Kerrville, Fredericksburg, and Comfort—extreme summer heat and severe storms mean mistakes like improper trim layering or crooked panel layout quickly lead to leaks.
If you prefer a seamless installation backed by warranties and expert crews, explore our professional metal roofing services or contact us directly at Total Foundation & Roofing to schedule an expert on-site evaluation for your home!