Essential Types and Materials for Asphalt Roof Flashing
Asphalt roof flashing is the sheet metal system installed at every joint, edge, and penetration on your roof to stop water from getting in. Without it, even a brand-new shingle roof will leak. At Total Foundation & Roofing, we ensure every component of your home’s exterior is built to last. This guide walks you through exactly how proper flashing is installed, what to look for, and how to keep your roof watertight for the long haul. In the Texas Hill Country, the combination of intense UV rays and sudden, heavy downpours makes the integrity of your flashing just as important as the shingles themselves. When we talk about a “roofing system,” we aren’t just talking about the visible shingles; we are talking about the complex network of metal barriers that direct water away from the most vulnerable parts of your structure.
Quick answer — what is asphalt roof flashing and where does it go?
| Flashing Type | Location | Purpose |
|---|---|---|
| Step flashing | Roof-to-sidewall junctions | Directs water over each shingle course to prevent sidewall seepage |
| Drip edge | Eaves and rake edges | Guides water into gutters and protects the roof deck edge |
| Pipe boot | Vent and plumbing stack penetrations | Seals around pipes to prevent vertical water intrusion |
| Valley flashing | Where two roof planes meet | Channels heavy runoff in high-volume drainage areas |
| Chimney flashing | Around chimney base | Prevents pooling and seepage at the masonry-to-roof transition |
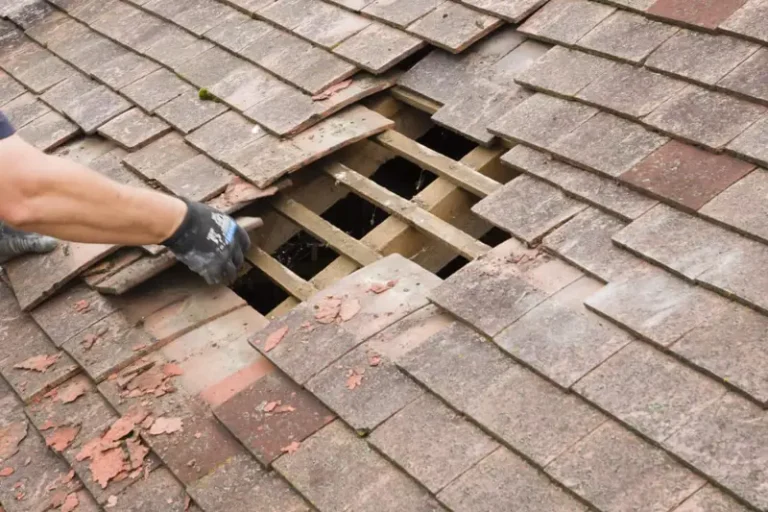
Every one of these locations is a potential leak point. Flashing is what stands between those weak spots and water damage to your home’s structure. Flashing failures — not shingle failures — are the leading cause of roof leaks. A shingle can last 30 years, but poorly installed flashing can fail in two. In the Texas Hill Country, where summer storms arrive fast and hit hard, that difference matters enormously. If water gets behind a piece of flashing, it can rot the roof deck, destroy insulation, and lead to mold growth inside your attic long before you see a drip on your ceiling.
I’m Daniel Sowell, owner of Total Foundation & Roofing Repair, and over my 18 years of roofing work across the Texas Hill Country, asphalt roof flashing installation and repair has been one of the most critical skills I’ve developed to protect homeowners from costly water damage. Let’s get into the details so you know exactly what a proper flashing job looks like.

Asphalt roof flashing word guide:
Choosing the right material is the first step toward a leak-free roof. In the roofing industry, we primarily use thin layers of sheet metal designed to direct water toward gutters and away from the building interior. While some modern polymer alternatives exist, metal remains the gold standard for durability and longevity. The material must be able to withstand the thermal expansion and contraction that occurs when a roof heats up to 150 degrees in the Texas sun and then cools rapidly during a thunderstorm.

The most common materials we use in the Texas Hill Country are:
- Galvanized Steel: This is the industry workhorse. It is strong, cost-effective, and coated in zinc to resist rust. We recommend using at least 26-gauge thickness for heavy-duty applications. It provides excellent rigidity, which is vital in high-wind areas where thinner metals might vibrate or deform.
- Aluminum: Naturally corrosion-resistant and easy to form on-site. It is a popular choice for residential roofs because it doesn’t rust. However, it is softer than steel, so it must be handled carefully to avoid punctures during installation.
- Copper: The premium choice. It is incredibly durable and develops a beautiful patina over time, though it comes at a much higher price point. Copper is often used on historic homes or high-end custom builds because it can last over 50 years if soldered correctly.
According to Owens Corning flashing standards and the Asphalt Life(R) | The Atlas Roofing Guide To Flashing, proper material selection is critical because different metals react differently to environmental stressors. Flashing also has to be compatible with nearby materials. For example, mixing dissimilar metals like aluminum and copper can cause galvanic corrosion, which eats through the metal in a matter of years. Furthermore, using the wrong flashing profile at a wall or penetration can trap water instead of shedding it. That is why material choice should always be matched to roof design, climate, and the type of roofing system being installed.
| Feature | Aluminum Flashing | Galvanized Steel (26-ga) |
|---|---|---|
| Rust Resistance | Excellent | Good (until coating breaks) |
| Rigidity | Moderate | High |
| Ease of Installation | Very Easy | Moderate |
| Best For | General Residential | High-Wind Areas |
Core Components: Step Flashing and Drip Edges for asphalt roof flashing
For a standard shingle roof, two components do the heavy lifting: step flashing and drip edges. Step flashing consists of individual L-shaped metal pieces. For shingles with a standard 5-inch exposure, these pieces should be at least 10 inches long and 7 inches wide. These are woven into the shingle courses at sidewalls. This “weaving” ensures that if water gets past the shingle, it hits the metal and is immediately funneled back out onto the next shingle down the line. If you are dealing with a complex roof, you might also need to install metal valley flashing on a shingle roof to handle the high volume of water that collects where two roof planes meet. Valleys are high-traffic areas for water, and using a pre-formed metal W-valley is often the best way to ensure long-term performance.
Drip edges are installed along the eaves and rakes. Their job is to support the shingle edge and ensure water “drips” into the gutter rather than wicking back into the wooden fascia or roof deck. This is a foundational part of asphalt shingle roofing that many DIYers overlook. In many cases, improper drip edge placement leads to fascia rot, peeling paint, and moisture intrusion along the roof perimeter. Installed correctly, drip edge helps control runoff, supports the starter course, and reduces the chance of wind-driven rain getting under the shingles. Without a drip edge, surface tension can pull water backward under the shingles, a phenomenon known as capillary action, which is a silent killer of roof decks.
Specialized Penetration Seals and asphalt roof flashing Boots
Every time a pipe or vent pokes through your roof, you have a hole that needs a specialized seal. These are often called “boots.”
- Pipe Boots: These usually feature a metal base with a rubber or silicone collar. The Oatey(R) All-Flash(R) No-Calk(R) Roof Flashings/Galvanized Base is a popular choice because its patented collar design allows it to fit multiple pipe sizes. The base must be integrated into the shingle courses—shingled over at the top and sides, but resting on top of the shingles at the bottom.
- High-Temp Silicone: For stove pipes or hot exhausts, standard rubber boots will melt. High-temp silicone boots can withstand temperatures up to 212 degrees Fahrenheit and are essential for wood-burning stoves or high-efficiency furnace vents.
- Chimney Crickets: If your chimney is wider than 24 inches, a “cricket” or saddle is required to divert water around it. This is a small peaked structure built behind the chimney that prevents water from pooling against the masonry.
According to GAF leak barrier requirements, using high-quality seals at penetrations is non-negotiable for a valid warranty. If you notice water stains on the ceiling near a vent, it is time for roof leak detection to see if a boot has cracked or pulled away. These vulnerable points often fail before the rest of the roof system, especially under strong UV exposure and repeated expansion and contraction. Catching that wear early can turn a major interior repair into a simple flashing replacement.
Professional Installation and Maintenance of asphalt roof flashing
Installation is where the “art” of roofing meets the “science.” One of the most important concepts we follow is “differential movement.” Your house is a living thing; the roof deck and the walls move at different rates as temperatures change. If you nail flashing to both the wall and the roof, the metal will buckle or pull the nails out as the house settles. This is why professional installers only nail the flashing to the roof deck, allowing the vertical wall to move independently behind the siding or counter-flashing.

Step-by-Step Installation at Roof-Wall Junctions
Proper asphalt roof flashing at a sidewall must be installed in a shingle-by-shingle sequence so water is always layered out onto the roof surface. When we install asphalt roof flashing at a sidewall, we follow a strict sequence to ensure maximum protection:
- Underlayment: We run the underlayment 3 to 4 inches up the vertical wall. This provides a secondary backup layer in case the metal flashing is ever overwhelmed by wind-driven rain.
- The First Piece: An apron or “starter” flashing is placed at the bottom. This piece is critical because it transitions the water from the vertical wall to the horizontal eave.
- Step and Shingle: We lay a shingle, then a piece of step flashing bent at a 90-degree angle. The horizontal flange is nailed to the roof deck (never the wall!) with two nails placed within 1 inch of the top edge. This ensures the nails are covered by the next course of shingles.
- The 2-Inch Rule: Each piece of flashing should have a 2-inch top lap over the piece below it. This overlap is what prevents water from “wicking” upward between the metal sheets.
- Integration: This process repeats up the wall, weaving the metal and shingles together so water is always forced back onto the surface of the shingles.
For major projects like a roof replacement, we ensure that every headwall intersection uses a 120-degree pre-bent flashing to accommodate the roof pitch perfectly. We often use “bread-pan” folds at corners to ensure a seamless, watertight corner. You can see similar techniques in the Asphalt Shingles – Curb Flashing (Typical) manual. These folds are superior to simply cutting and caulking the metal, as they rely on the shape of the metal rather than a sealant to stop water.
Avoiding Common Installation Defects and Moisture Wicking
The most common error we see in the Texas Hill Country is “continuous flashing” on sidewalls. This is a defective installation because it doesn’t allow for the natural layering of shingles, eventually leading to leaks. Continuous flashing is a single long piece of metal tucked under the siding. Because it isn’t woven with the shingles, water can easily find its way behind the metal and into the wall cavity.
Another critical factor is the gap between your siding and the shingles. You must maintain a 1.5-inch clearance gap. If the siding is installed directly against the shingles, it will wick up moisture. This leads to rot, peeling paint, and delamination of the siding material. This gap also allows for easier inspection and replacement of the flashing in the future without having to tear off the siding.
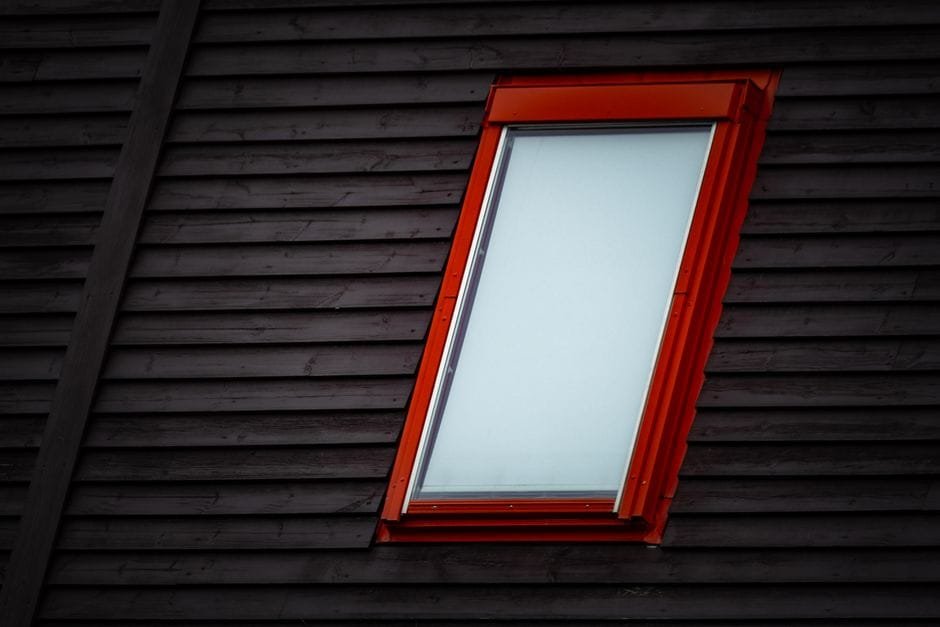
If you’re dealing with a mixed-material roof, such as a transition from shingles to metal, the complexity increases, and precision becomes even more vital to prevent capillary action from pulling water under the shingles. These transitions require custom-bent flashing that accounts for the different profiles of the two roofing materials.
Long-Term Maintenance and Repair Guidelines
Annual inspection is the standard best practice for asphalt roof flashing, especially after major storms, hail, or high-wind events. Even the best asphalt roof flashing needs a check-up. We recommend an annual inspection, especially after the heavy storm seasons in Fredericksburg and Kerrville, TX.
Signs of Flashing Failure:
- Rust Spots: Indicates the protective coating on galvanized steel is gone. Once rust starts, it will eventually eat a hole through the metal.
- Cracked Caulking: Sealants are temporary fixes and usually fail within a few years due to UV exposure. If your flashing relies solely on caulk, it is a ticking time bomb.
- Pry-ups: Nails that have backed out due to house movement or improper nailing. These “shingle pops” can lift the flashing and create a water entry point.
- Worn Boots: The rubber collars on pipe vents often rot or crack long before the shingles do. A cracked boot can allow gallons of water into your attic during a single storm.
If you find yourself in a bind after a hail storm, our emergency roof repair team can quickly secure these transition points. Often, a roof repair involving just the flashing can save you from the cost of a full replacement. We recommend homeowners take a pair of binoculars and look at their roof from the ground once a year. Look for any metal that appears loose, shiny spots where paint has worn off, or debris trapped behind chimneys, as these are all precursors to flashing failure.
Expert Roofing Services in the Texas Hill Country
At Total Foundation & Roofing, we take pride in being the local experts for both residential and commercial projects. Whether you’re in Kerrville, Fredericksburg, or Comfort, we understand the unique weather patterns that stress your roof. Our climate is particularly harsh on sealants and rubber components, which is why we emphasize mechanical flashing techniques that don’t rely on “goop” to stay dry.
Our team provides certified, high-quality workmanship that focuses on the details — like proper asphalt roof flashing — that other contractors might rush through. We don’t just “slap on” shingles; we build a complete water-shedding system designed to last. We use heavy-gauge metals and follow manufacturer-specific installation patterns to ensure your warranty remains fully intact.
If you’re worried about a potential leak or just want the peace of mind that comes with a professional inspection, we offer comprehensive residential roofing services tailored to the needs of Hill Country homeowners. Don’t wait for a stain to appear on your ceiling to check your flashing. Contact our team today to schedule your professional inspection and ensure your home stays dry through the next storm season!