Why Metal Roof Seam Leaks Cost More Than You Think
Metal roof seam repair is the process of sealing, re-fastening, or patching the joints between metal roofing panels to stop leaks and prevent water damage. At Total Foundation & Roofing Repair, we specialize in these intricate fixes. For homeowners seeking reliable roofing and foundation solutions, maintaining these joints is the most critical aspect of roof longevity. The physics of a metal roof are complex; unlike traditional shingles, metal panels expand and contract significantly. This phenomenon, known as thermal movement, can cause seams to open by fractions of an inch every day. Over time, this movement fatigues the sealants and loosens the fasteners, creating a direct path for moisture to enter your home’s structure.
Neglecting these small gaps can lead to catastrophic structural rot, mold growth in the attic, and compromised insulation efficiency. In the Texas Hill Country, where temperatures can swing 40 degrees in a single afternoon, the stress on these seams is relentless. A single failed seam can allow gallons of water to penetrate the building envelope during a typical spring thunderstorm, leading to thousands of dollars in interior damage that insurance may not fully cover if maintenance was neglected. Here’s a quick overview of how it’s done:
- Inspect seams, fasteners, and flashing for gaps, rust, or separation
- Clean the damaged area thoroughly — remove old sealant, rust, and debris
- Choose your repair method — butyl tape, polyurethane sealant, or a fabric-reinforced coating like Turbo Poly Seal
- Apply the sealant or tape over the seam, covering at least 2 inches on each side
- Re-fasten any loose or corroded screws with proper neoprene-washer screws
- Allow full cure time before exposing the repair to rain or weather
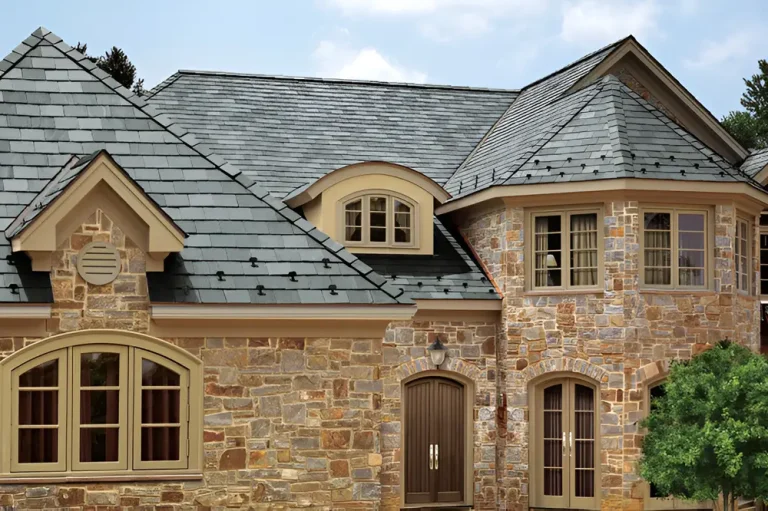
Metal roofs are built to last decades. Most homeowners who invest in one expect it to be the last roof they ever buy. According to the Metal Construction Association, metal roofing can last 50 years or more with proper maintenance. But there’s one weak point that causes the vast majority of metal roof leaks: the seams. Industry data shows that 95% of metal roof leaks originate at seams, fasteners, and penetrations — not from the panels themselves. In hot, high-UV climates like the Texas Hill Country, this problem accelerates fast. Extreme heat cycles cause panels to expand and contract daily, putting constant stress on sealants. At Total Foundation & Roofing, we see this pattern constantly. Our metal roofing services are designed specifically to catch and fix these issues before they compound. I’m Daniel Sowell, owner of Total Foundation & Roofing Repair, and I’ve spent over 18 years performing metal roof seam repair across the surrounding Hill Country.

Step-by-Step Guide to Metal Roof Seam Repair
Repairing a metal roof seam is more about the preparation than the actual application of the sealant. If you apply the world’s best sealant over a layer of dust, rust, or old peeling paint, it will fail within a single season. This is especially true in the Texas climate, where thermal shock can cause surface temperatures to fluctuate by 40 degrees in a matter of hours.

Identifying and Preparing for Metal Roof Seam Repair
Before you climb onto the roof, start in the attic. During a bright day, look for “daylight” peeking through the roof deck. If you see light, water is definitely getting in. However, keep in mind that water can travel far from the entry point due to capillary action—a phenomenon where water is “sucked” into tight spaces between overlapping metal panels. This is often exacerbated by hydrostatic pressure during heavy downpours, where the weight of the water pushes it through microscopic gaps in the seam. This pressure can force water uphill, defying gravity, which is why simply “caulking the bottom” of a seam rarely works.
Once you are on the roof, safety is the priority. Wear non-slip shoes and use a fall-arrest system if your roof pitch exceeds 6:12. To prepare the surface effectively, you must understand that the bond is only as strong as the substrate. If you are applying a high-performance polymer over oxidized metal, the oxidation will simply flake off, taking your expensive repair with it. To prepare the surface:
- Remove Old Material: Use a putty knife or an electric grinder with a wire brush to strip away old tar, cracked caulking, or peeling paint.
- Scuff the Surface: Use sandpaper or a wire brush to “rough up” the metal. This creates a “profile” that helps the new sealant bond mechanically to the steel. You aren’t just cleaning the metal; you are increasing the surface area for the sealant to grab onto.
- Chemical Clean: Wipe the area with lacquer thinners. This is a critical step to remove invisible silicone residues or factory lubricants that prevent new sealants from sticking. Many factory-applied coatings contain Kynar or silicone-based finishes designed to shed dirt; unfortunately, they also shed new sealant unless chemically etched.
- Dry Completely: Ensure the surface is 100% dry. Even a microscopic layer of dew can cause a repair to fail, as moisture trapped under the sealant will vaporize in the sun and cause blistering.
For more detailed identification techniques, check out The Ultimate Metal Roof Leak Repair Manual.
Applying Sealants and Tapes for Long-Lasting Results
When it comes to metal roof seam repair, you generally have three high-quality choices. Avoid standard “window and door” silicone from big-box stores; it lacks the UV resistance and flexibility needed for Texas roofs. Instead, look for high-solids polyurethanes or tri-polymer sealants that maintain elasticity even at extreme temperatures.
| Repair Material | Best Use Case | Longevity |
|---|---|---|
| Butyl Tape | Hidden laps during installation or minor gap sealing | 15–20 Years |
| Polyurethane Sealant | Small cracks, fastener heads, and flashing joints | 5–10 Years |
| Turbo Poly Seal | Large seam separations and high-flex areas | 10–15 Years |
The Professional 5-Step Method:
- First Coat: Brush a layer of Turbo Poly Seal or a high-grade polyurethane sealant 2 inches wide on both sides of the seam. Ensure the bead is thick enough to bridge any minor gaps.
- Reinforce: Embed a strip of polyester fleece into the wet sealant. This fabric acts like “rebar” for the sealant, allowing it to stretch without snapping during thermal expansion. This is the secret to a repair that lasts 10+ years.
- Top Coat: Apply a second layer of sealant over the fleece until the fabric is completely saturated. The goal is to create a monolithic membrane that moves with the roof.
- Protect: Once cured, apply a UV-reflective coating (like Aluminum Asphalt paint) to protect the repair from the brutal Hill Country sun. UV rays are the primary cause of sealant embrittlement.
- Fasten: If the seam is physically “gapping,” use stitch screws to pull the metal together before sealing. This reduces the mechanical load on the sealant itself.
If you are dealing with complex roof geometries, such as Metal Building Gutter maintenance, ensuring the transition between the seam and the gutter is seamless is vital.
Specialized Metal Roof Seam Repair for Standing Seam vs. Exposed Fasteners
The method you use depends heavily on your roof type.
- Standing Seam Roofs: These are “hydrostatic” designs where the seams are raised above the water line. If a standing seam slips (common in 10-foot sections), it can move 1–2 inches. In these cases, you may need to mechanically correct the “snap-lock” deformation before applying any tape or liquid. Use narrow strips of membrane fabric to allow for thermal expansion movement, which can exceed 1/4 inch per 10 feet of panel.
- Exposed Fastener (Corrugated) Roofs: These rely on screws with neoprene washers. Over 15–20 years, these washers dry out and crack. If a seam is leaking here, it’s often because the screws have backed out due to heat. Replace them with “oversized” fasteners (one size larger than the original) to ensure a tight grip in the existing hole. This is a critical part of maintaining the structural integrity of the panel overlap.
For a deeper dive into the mechanics of these systems, refer to our Metal Roof Installation Complete Guide.
Professional Maintenance and Long-Term Prevention
Prevention is always cheaper than a cure. We recommend a “15% Rule”: if more than 15% of your total roof area shows signs of seam failure or rust, a full replacement is usually more cost-effective than constant patching. This is a standard we use to help homeowners avoid the ‘sunk cost fallacy’ where they spend thousands on repairs for a roof that is structurally compromised.
When to Call a Professional for Structural Seam Issues
While DIY metal roof seam repair is possible for small leaks, some situations require Professional Metal Roofers. According to industry leaders like GAF, regular inspections are the only way to prevent catastrophic structural failure.
- House Settling: If your home is shifting due to foundation issues, the metal panels will be pulled apart with thousands of pounds of force. No sealant can stop a structural shift. You may need to address the root cause via Foundation Repair Services before fixing the roof.
- Galvanic Corrosion: If you see “bleeding” rust at the seams, it might be caused by using incompatible metals. For example, using copper flashing on a steel panel creates a battery-like chemical reaction. This is why we strictly follow the material compatibility guidelines established by Owens Corning to ensure the entire system remains watertight. If the zinc-aluminum coating is breached, the steel will sacrifice itself to the corrosion.
- Steep Slopes and Heights: OSHA requires fall protection for any work over 6 feet. If you aren’t comfortable with harnesses and anchors, call an Emergency Roof Repair team.
Protecting Your Investment in the Texas Hill Country
Our climate is unique. With average humidity levels often hitting 75% and temperatures swinging from 20 F to over 100 F, your roof is basically a living, breathing thing. This constant expansion and contraction can lead to ‘oil canning,’ where the metal panels develop wavy ripples that put extra stress on the seams.
- UV Protection: Use sealants rated for at least 150 F. Standard caulk will “cook” and become brittle in a single Texas summer. High-quality repairs should always be top-coated with a UV-resistant finish to prevent the polymer from breaking down.
- Debris Management: Keep valleys and seams clear of cedar needles and oak leaves. Organic debris traps moisture against the seam, accelerating rust faster than on a clean roof. This moisture can also lead to the growth of algae, which further degrades sealants and eats away at the protective paint finish.
- Annual Checks: Inspect your ridge caps and Metal Roofing Fredericksburg TX installations every spring before the storm season hits. Look for fasteners that have ‘backed out’ or washers that have become brittle and lost their seal.
Conclusion and Next Steps for Your Roof
A metal roof is a high-performance system, but even the best systems need a tune-up. Whether you’re tackling a small DIY metal roof seam repair with EternaBond tape or you’ve realized that the “slipped” seam on your barn needs professional intervention, don’t wait for the next Hill Country thunderstorm to test your work. The cost of a professional inspection is a fraction of the cost of replacing moldy insulation or water-damaged drywall.
Looking ahead, the 2026 climate standards for residential construction emphasize the need for ‘resilient building envelopes.’ This means your roof must do more than just shed water; it must withstand higher wind loads and more frequent thermal cycling. A properly executed repair is a key component of this resilience. At Total Foundation & Roofing, we specialize in the technical nuances of Texas roofing. From Kerrville roofing experts to our certified crews in Fredericksburg, we provide high-quality materials and workmanship that stands up to these rigorous standards. By adhering to the guidelines set by manufacturers like GAF, we ensure that every seam we seal is prepared to withstand the brutal Texas sun and the torrential downpours that follow.
Don’t let a small gap turn into a big budget hole.
If you’re unsure about the state of your seams, or if your DIY fix didn’t hold, contact us today. We offer no-obligation inspections to help you decide between a simple repair or a more robust solution via our Roof Repair Services page.