Why Patching Concrete Floor Issues Early Saves You Money
Patching concrete floor damage is a critical maintenance task that prevents minor problems from becoming major structural issues. For homeowners and businesses, understanding how to properly repair concrete is key to saving money and ensuring safety. With our experience in foundation and concrete repair, we’ve seen how small cracks can escalate, but with the right approach, most floors can be restored without a full replacement.
Quick Answer for Patching Concrete Floor:
- Clean the damaged area – Remove all loose debris and dust with a wire brush and vacuum.
- Prepare the surface – Chip away weak concrete and undercut crack edges for better bonding.
- Apply bonding agent – Wet the area and apply a bonding primer (if required by your patch material).
- Fill the damage – Force patching compound into the crack or hole, eliminating air pockets.
- Finish and cure – Smooth the surface flush with surrounding concrete and keep moist for 24-48 hours.
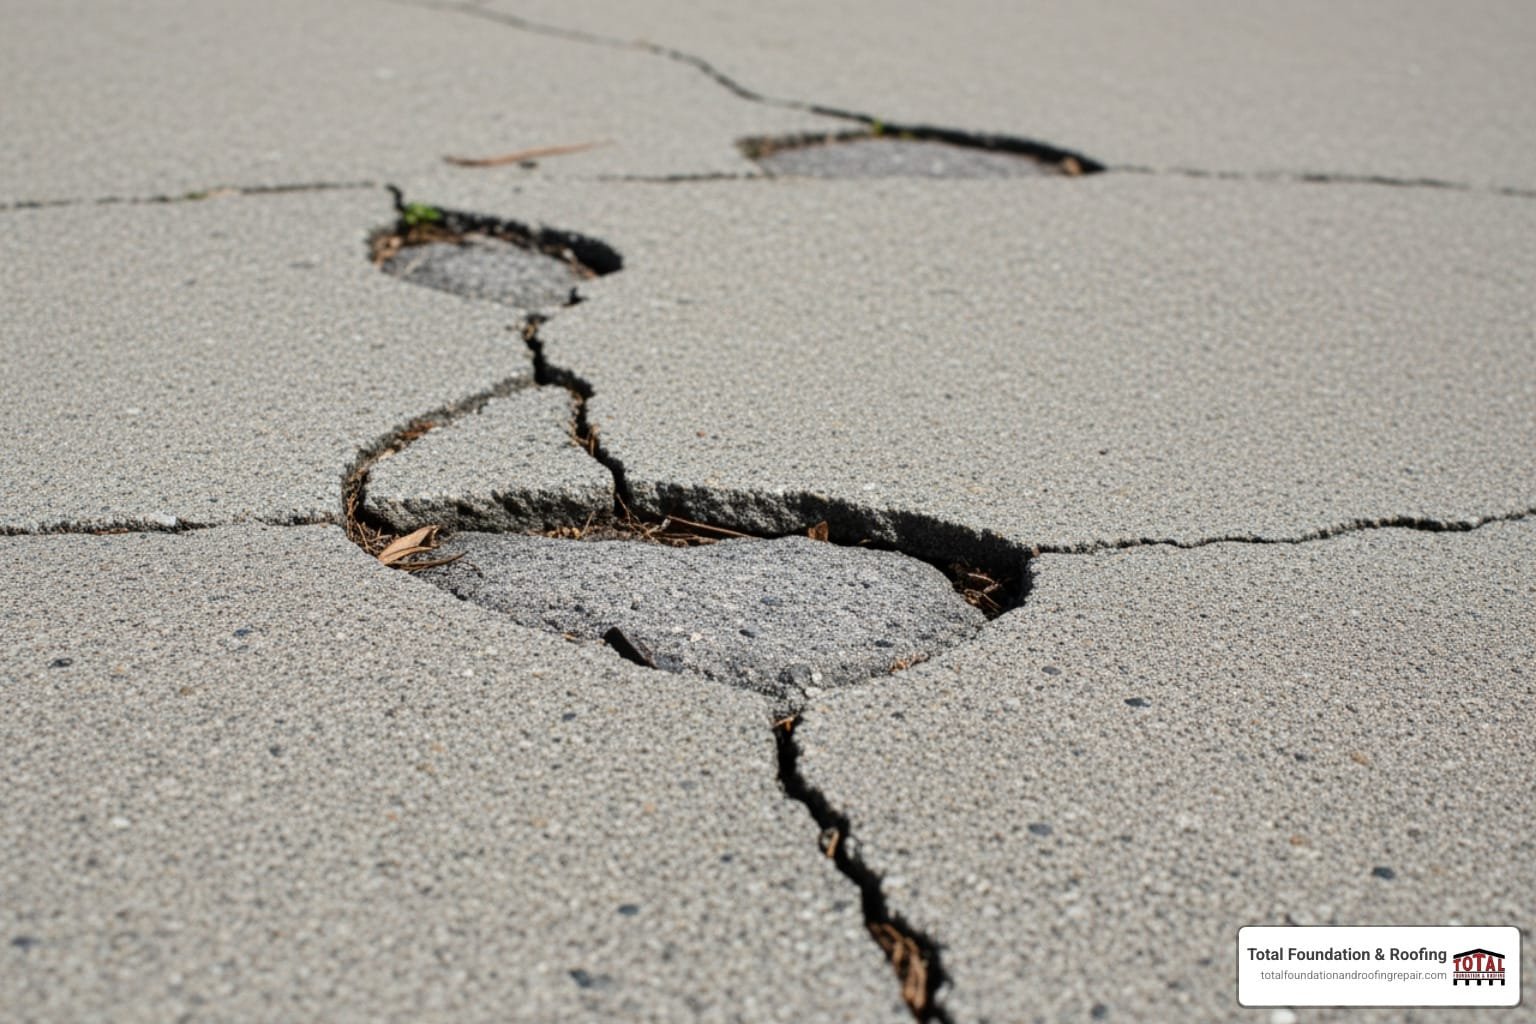
Concrete floors crack for several reasons, including tension failure, heavy impact, and pitting from acidic liquids. In the Texas Hill Country, environmental factors like shifting soil and freeze-thaw cycles accelerate this damage. According to the University of Vermont Extension, cracks and pits can create harborage points for pathogens, a serious concern for food handling facilities and residential garages.
Fortunately, most concrete floor damage is repairable. Modern materials like fast-setting cement patchers, epoxy compounds, and polyurethane sealants offer compressive strengths of 5,000 to 9,000 PSI—often stronger than the original concrete. With proper surface preparation, you can restore your floor’s structural integrity and appearance.
I’m Daniel Sowell, owner of Total Foundation & Roofing in Kerrville, Texas. For over 18 years, I’ve helped countless clients tackle patching concrete floor challenges. Understanding the proper repair technique makes all the difference between a patch that lasts decades and one that fails within months.
, surface preparation steps with cross-section diagrams, application techniques, and timeline for cure times - patching concrete floor infographic infographic-line-5-steps-elegant_beige")
Patching concrete floor terms simplified:
Getting Started: Assessing Damage and Gathering Supplies
A damaged concrete floor is more than an eyesore—it’s a safety hazard. While concrete is durable, issues like cracks, pits, and spalling are common over time, especially in areas with shifting soil like the Texas Hill Country. For extensive damage, professional concrete services are the smart move. However, many common issues are perfect for a DIY approach, saving you money while restoring your floor’s integrity.
Identifying the Cause and Type of Damage
Before patching concrete floor issues, you must identify the cause. Concrete is strong under compression but brittle in tension, which is why most cracks appear.
- Tension Failure: As concrete expands and contracts with temperature changes or shifting soil, it can be pulled apart, causing cracks. This is common in the Texas Hill Country due to our expansive clay soils.
- Heavy Impact: Dropping a heavy tool can create localized chips, holes, or divots.
- Freeze-Thaw Cycles: Water seeps into cracks, freezes, expands, and thaws, gradually widening the damage and causing surface flaking (spalling).
- Pitting: Acidic liquids can eat away at the cement paste, leaving small pits that can harbor pathogens.
- Spalling: This flaking or chipping of the surface is often caused by freeze-thaw cycles or corrosion of rebar.
Assess the damage severity. Hairline cracks may be cosmetic, but cracks wider than a quarter-inch or those that are actively growing can signal serious structural issues. If you see these signs, it’s time to call experts for a professional assessment in Kerrville. For more details, see our guide on concrete crack solutions.
Choosing the Right Concrete Repair Product
The right product is crucial for a lasting patch. Each is suited for different situations.
- Cement-Based Patchers: These traditional mixes are ideal for larger holes and deep cracks. They are economical and blend well with existing concrete but can be brittle.
- Epoxy Compounds: These two-part systems offer incredible strength (up to 9,000 PSI) for structural repairs. They bond strongly and cure quickly but are more expensive and less flexible.
- Polyurethane Sealants: Offering excellent flexibility, these are perfect for hairline cracks that experience seasonal movement. They accommodate expansion and contraction but are not for deep structural repairs.
When choosing, consider compressive strength (PSI), cure time, and flexibility. A high PSI ensures the patch is strong, while cure time affects how quickly the area can be used. Flexibility is vital in areas with temperature swings or soil movement. For more guidance, explore our resource on concrete repair methods.
Essential Tools and Materials for the Job
Gathering your supplies beforehand ensures a smooth process. You will need:
- Safety Gear: Safety glasses, work gloves, a dust mask, and sturdy footwear are non-negotiable.
- Preparation Tools: A hammer, chisel, wire brush, and shop vacuum are essential for cleaning and preparing the damaged area.
- Application Tools: A water sprayer, mixing bucket, drill with a mixing paddle, and various trowels (margin, steel finishing, or rubber grout) are needed for application and finishing.
- Materials: Have your chosen patching compound, a bonding agent (if required), and plastic sheeting for curing.
If you’re dealing with foundation-related issues like uneven concrete or problems from expansive soil, a professional assessment is recommended. Our guide on fixing foundation cracks offers more insight. For expert guidance, contact Total Foundation & Roofing at (830) 222-2900.
The Ultimate Guide to Patching a Concrete Floor
With your damage assessed and tools ready, it’s time to begin. Patching concrete floor issues effectively hinges on meticulous preparation and careful application. Follow these steps for a result you can be proud of.

Step 1: Preparing the Surface for a Lasting Patch
Surface preparation is the most critical step for a durable repair. A strong bond depends entirely on a clean, solid surface.
- Clean and Clear: Use a stiff brush and shop vacuum to remove all loose debris, dirt, and dust from the repair site.
- Remove Unsound Concrete: With a hammer and chisel, chip away any loose or crumbling concrete until you reach a solid base. For cracks, widen the top to create a V-groove, which helps lock the patch in place. For deeper holes, undercut the edges to create a mechanical key that prevents the patch from popping out.
- Address Contaminants: Mechanically remove any paint, oil, or old adhesive, as these will prevent the patch from bonding. Chip away concrete that is heavily saturated with oil.
- Final Vacuum: Thoroughly vacuum the area again to ensure it is spotless.
- Dampen the Surface: For most cement-based patches, lightly mist the area with water to achieve a Saturated Surface Dry (SSD) condition. The surface should be damp with no standing water. This prevents the old concrete from drawing moisture out of the new patch too quickly.
For more in-depth techniques, explore our guide on concrete repair methods.
Step 2: The Step-by-Step Process for Patching Concrete Floor
With the surface prepped, you can begin patching.
- Safety First: Always wear safety glasses and gloves. Ensure good ventilation and wear a dust mask, especially when mixing dry materials or using epoxies.
- Mix the Material: Follow the manufacturer’s instructions precisely. For cement-based products, aim for a stiff, peanut butter-like consistency. For two-part systems like epoxy, mix thoroughly with a drill and paddle, and be mindful of the limited working time (pot life).
- Apply Bonding Agent: If your product requires a separate bonding agent, brush it onto the prepared surface and let it get tacky. Note: Some modern products do not require a separate agent, so always check the label.
- Fill the Damage: Using a margin trowel, forcefully press the patching material into the crack or hole to eliminate air pockets. For deep repairs (over 1/2 inch), apply in layers. For cracks, ensure the material completely fills the V-groove. Our guide on fixing foundation cracks has more details for specific crack types.
- Finish and Feather: With a steel or rubber trowel, smooth the patch so it’s flush with the surrounding concrete. Feather the edges to create a seamless transition. Clean your tools immediately before the material hardens.

Step 3: Curing and Protecting Your New Concrete Floor Patch
Proper curing is essential for the patch to achieve maximum strength. Rushing this step can lead to failure.
- Prevent Rapid Drying: Concrete cures through a chemical process called hydration, which requires moisture. To ensure a strong cure, keep the patch damp for the first 24-48 hours by misting it periodically with water.
- Cover the Patch: Immediately after finishing, cover the area with plastic sheeting. This traps moisture, creating a humid environment that allows the patch to cure slowly and develop maximum strength.
- Respect Cure Times: Most patches can handle light foot traffic in 24-48 hours, but full strength may take 7-28 days. Avoid placing heavy loads or driving on the patch during this period.
- Protect the Area: Use barriers or signs to keep pets, children, and heavy objects off the fresh patch until it has fully cured.
A video guide on this topic is available here for a helpful visual reference.
When to DIY vs. When to Call a Concrete Professional
While we empower clients to tackle many repairs, sometimes patching concrete floor damage is a temporary fix for a deeper problem. Knowing when to DIY and when to call a professional is key.
Deciding Between DIY Repair and Professional Help
A DIY approach is suitable for:
- Small, non-moving hairline cracks that are superficial.
- Minor pitting or shallow spalling on the surface.
- Small holes or divots from minor impacts.
Professional help is necessary for:
- Large, deep cracks (wider than a quarter-inch) or those that extend through the slab.
- Actively moving cracks that change with the seasons, indicating soil or foundation movement.
- Uneven concrete or heaving slabs, which point to underlying issues like expansive soil foundation problems that may require concrete leveling services.
- Widespread spiderweb cracking or spalling, suggesting a problem with the original installation.
- Associated structural signs, like wall cracks or sticking doors.
The Importance of a Professional Assessment
In the Texas Hill Country, our expansive clay soils swell and shrink, putting immense stress on concrete slabs. A surface crack can be a warning sign of significant movement below. A professional assessment is invaluable for diagnosing the root cause.
At Total Foundation & Roofing, we understand how the soils in Kerrville and the surrounding Hill Country behave. We don’t just look at the symptom; we investigate the cause, examining your foundation system for soil movement, drainage issues, or structural stress. This allows us to recommend the right solution the first time.
Get Your Concrete Floor Repaired by the Experts
Choosing professional help for your patching concrete floor needs ensures the job is done right. The team at Total Foundation & Roofing brings certified expertise custom to our region’s unique challenges. Our concrete crack repair services address the root cause of damage, providing a repair that doesn’t just look good—it lasts.
We use professional-grade materials and proven techniques refined over 18 years of service. The result is a durable, high-quality finish that stands up to the Texas Hill Country climate. For a lasting solution and peace of mind, request your free estimate online. We’re here to help you make the right decision for your property.