Table of Contents
ToggleYour Guide to a Secure Roof
Fixing roof tiles doesn’t have to be overwhelming. Whether you’re dealing with a cracked clay tile, a missing concrete tile, or water stains on your ceiling, quick action can prevent minor issues from becoming major headaches. For homeowners in the Texas Hill Country, maintaining a solid roof is crucial for protecting your home. While some jobs require professional roof repair services, replacing a single damaged tile can often be a manageable DIY project.
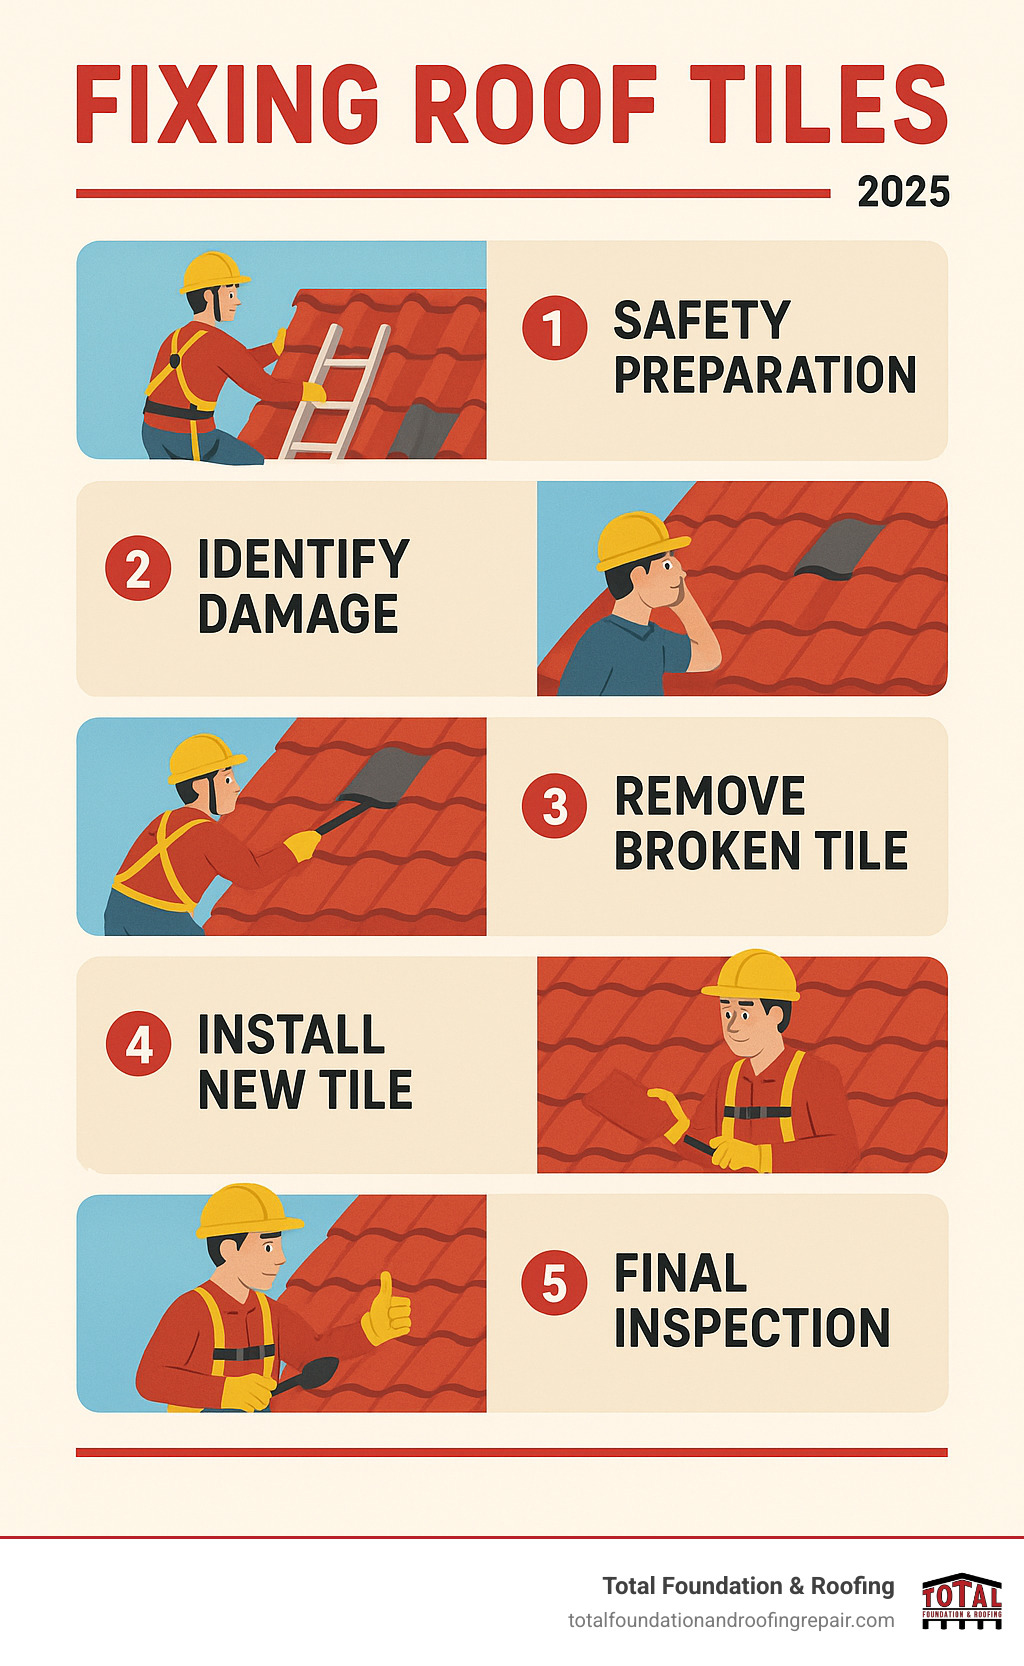
Quick Guide to Fixing Roof Tiles:
- Identify the damage – Look for cracked, missing, or displaced tiles
- Gather safety equipment – Ladder, harness, non-slip shoes, and gloves
- Remove the broken tile – Use a pry bar and wooden wedges
- Install the replacement – Apply roofing cement and slide in the new tile
- Seal and inspect – Check surrounding tiles for additional damage
A cracked or missing roof tile might seem small, but it’s an open invitation for water damage and pests. The stakes are higher than you might think. Clay tiles can last 80-100 years and concrete tiles 50-60 years, but only with proper maintenance. A single broken tile can allow water into your roof cavity, leading to thousands in structural damage if left unchecked.
As the owner of Total Foundation & Roofing Repair, with over 18 years of experience in the Texas Hill Country, I’ve seen how fixing roof tiles promptly saves homeowners from costly repairs and preserves their home’s value for decades to come.
Your Step-by-Step Guide to Fixing Roof Tiles
When your roof shows wear, it’s natural to feel overwhelmed. The good news is that fixing roof tiles is often more straightforward than you think. With the right knowledge and a careful approach, many homeowners can tackle minor tile repairs themselves.
Identifying the Problem and Tile Type
Before you start fixing roof tiles, you need to play detective. A thorough roof health checkup now will ensure a successful repair later.
Spotting warning signs is your first priority. Cracked tiles, even those with hairline fractures, are a common issue in the Texas Hill Country, where sun and storms stress materials. Water can find the tiniest openings. Missing tiles are another obvious red flag, often occurring after high winds lift them from the roof, leaving spots exposed.
Water stains on your ceiling are a serious warning. These brownish marks can appear far from the actual leak, as water travels along rafters before dripping down. Any sagging indicates structural water damage, meaning you must act quickly. Don’t overlook moss and algae growth, which traps moisture and deteriorates tiles over time.
Finding a leak’s source can be tricky. In daylight, head to your attic and look for light filtering through. For active leaks, have someone watch from the attic while you systematically spray the roof with a garden hose, working from low to high to isolate the problem area.
Understanding your tile type is crucial for sourcing replacements. Clay tiles are very durable, lasting 80-100 years. They are fire-resistant and ideal for Texas heat but can crack from impact. Concrete tiles offer great value, lasting 50-60 years in many styles. They are slightly porous and can absorb water. Slate tiles are a luxury option, lasting 100-150 years, but they are expensive and require specialized repair techniques.
Our Texas Hill Country weather puts unique stress on tiles. The constant expansion and contraction from sun and temperature changes, combined with high winds and hail, make regular inspections vital.
Sourcing matching tiles requires matching the type, color, manufacturer, size, and shape. Weathering can alter color, making a perfect match difficult. It’s wise to keep spare tiles from the original installation.
Preparing for Fixing Roof Tiles: Safety and Supplies
Safety is non-negotiable when fixing roof tiles. Skipping safety basics can turn a simple repair into an emergency room visit.

Gathering the right tools is key. You’ll need a sturdy ladder, a hammer and pry bar, timber wedges, roofing cement, a wire brush, and your replacement tiles. For personal protection, use non-slip shoes, sturdy gloves, and a tool belt to keep your hands free.
Ladder safety is critical. Place your ladder on firm, level ground, extending it at least three feet above the roof edge. Always have a spotter hold the base. For full protocols, follow the OSHA guidelines on ladder safety.
For any work above 6.5 feet, a personal fall arrest system (harness, lanyard, and anchor point) is crucial. Falls happen fast and without warning. Never work in wet, icy, or windy conditions, as slippery tiles and gusts of wind are extremely dangerous. If in doubt, wait for a better day.
The Process of Fixing Roof Tiles: A DIY Guide
Now for the satisfying part: actually fixing roof tiles. Take your time with each step to avoid mistakes and safety hazards.

First, assess the area around the damaged tile and clear away any debris with a wire brush. A clean workspace is essential.
To remove the broken tile, use a pry bar to gently lift the tiles above it, inserting timber wedges to hold them up. This gives you space to work. Un-nailed tiles should slide out. For nailed tiles, you may need to carefully break the nails or use a slate ripper. It’s okay to break the damaged tile into pieces for removal, but be careful not to harm surrounding tiles.
To install the new tile, first clean the surface and check the underlayment. If the underlayment is torn, patch it with roofing felt. Apply a bead of roofing cement where the new tile will sit, then carefully slide it into place, ensuring it aligns with its neighbors.
To secure the tile, drive new roofing nails at an angle through the top edge if the original was nailed. Cover exposed nail heads with roofing cement. For interlocking tiles, the cement should be sufficient. Carefully remove the timber wedges, letting the upper tiles settle back into place.
For the finishing touches, apply sealant around the new tile’s edges for a watertight seal. Inspect the surrounding tiles to ensure they weren’t dislodged during the repair. When you’re done, clean up thoroughly and use a magnet to find any dropped nails.
When to Call a Professional for Your Roof
While fixing roof tiles can be a rewarding DIY project, it’s wiser, safer, and more cost-effective to call experts for certain issues. Knowing when to call a professional is the mark of a smart homeowner.

Call a professional for these situations:
- Extensive Damage: Multiple broken or missing tiles across large areas often point to bigger problems like installation errors, age-related decay, or severe weather damage that need an expert assessment.
- Underlayment Damage: The underlayment is your roof’s waterproof barrier. If you find tears or deterioration beneath a tile, it requires specialized repair to prevent leaks.
- Safety Concerns: Steep pitches, multiple stories, or difficult access points require professional equipment and training. Don’t risk a fall.
- Structural Issues: A sagging roof, water-damaged sheathing, or widespread attic mold are signs of problems that go far beyond a simple tile replacement.
- Unknown Leak Source: If you have persistent leaks you can’t find, professionals have the diagnostic tools and experience to locate hidden entry points, such as compromised flashing.
- Specialized or Old Tiles: Slate, architectural, or very old tiles often require specific handling techniques and expertise.
If you lack the time, tools, or comfort level with heights, hiring a professional ensures the job is done right. For homeowners in our area needing expert roof repair in Kerrville, Total Foundation & Roofing understands the challenges of the Texas Hill Country climate. The peace of mind from a certified, professional repair is invaluable. Sometimes, the smartest DIY decision is knowing when not to DIY.
Protect Your Investment with Proper Roof Care
Properly maintaining your tile roof is a smart investment. A well-kept roof protects your home for decades, adding curb appeal and property value. While fixing roof tiles promptly is important, the key to long-term roof health is proactive maintenance.
Regular inspections make all the difference. At least once a year and after any severe Texas Hill Country storm, do a visual check from the ground. Look for missing or cracked tiles, water stains on your ceiling, or moss buildup. Also, keep gutters and valleys clear of debris to prevent water from backing up under tiles, which can cause leaks and damage.
Know when to call for backup. Recognizing your limits is crucial. Widespread damage, persistent leaks, or any structural issues require professional expertise. Attempting repairs beyond your skill level can lead to more extensive damage and higher costs.
For comprehensive assessments or repairs beyond a simple tile replacement, the certified team at Total Foundation & Roofing has years of experience with Texas Hill Country conditions. We understand how our climate affects roofing materials and are equipped to handle everything from minor repairs to major overhauls. If your roof has sustained significant damage or is near the end of its life, a full replacement may be a better long-term investment than continuing to patch an aging system. We’re here to help you protect your most valuable asset: your home.


