Why Basement Cracks Demand Your Immediate Attention
Basement crack repair is a critical home maintenance issue that affects thousands of Texas homeowners every year. Whether you’re dealing with hairline cracks or more serious structural damage, understanding your repair options can save you thousands of dollars and protect your property value.
Quick Answer for Basement Crack Repair:
- DIY Kits: $75-$225 for polyurethane or epoxy injection systems
- Professional Services: $500-$2,500 for interior crack injection with warranty
- Exterior Waterproofing: $5,000+ for excavation and membrane installation
- Best Materials: Polyurethane for wet cracks, epoxy for structural repairs
- Timeline: DIY repairs cure in 24-72 hours, professional repairs often same-day
Most basement cracks form due to normal concrete shrinkage, house settling (which takes 8-12 years to complete), or Texas’s challenging soil conditions. The key is distinguishing between non-structural settling cracks and structural issues that require immediate professional attention.
Here in the Texas Hill Country, our expansive clay soils and extreme weather swings create unique challenges for foundation stability. Ignoring even minor cracks can lead to water intrusion, mold growth, and costly structural repairs down the road.
I’m Daniel Sowell, owner of Total Foundation & Roofing Repair, and I’ve been helping Texas homeowners solve basement crack repair challenges for over 18 years. My team has seen everything from simple DIY fixes to complex structural repairs, and I’ll share the most effective solutions for each situation.

Why Basement Cracks Form & Why You Can’t Ignore Them
Here’s something that might surprise you: every concrete basement wall cracks. It’s not a matter of if, but when. As concrete cures, water evaporates and the material naturally shrinks, creating those initial hairline cracks you might notice in the first year after construction.
But living here in the Texas Hill Country means we’re dealing with forces that go way beyond normal concrete shrinkage.
Our expansive clay soils are like giant sponges that can’t make up their minds. When we get those heavy spring rains, the clay swells up and pushes against your foundation walls with tremendous force. Then summer heat bakes everything dry, and the same soil shrinks away, leaving your basement walls hanging without support.
Hydrostatic pressure sounds fancy, but it’s really just water trying to find its way into your basement. Poor drainage around your foundation creates a swimming pool effect underground, and water will find every tiny crack to squeeze through.
The freeze-thaw cycles we occasionally get in Texas might not be as brutal as up north, but when water gets into a crack and freezes, it expands with enough force to widen that crack significantly.
And if your home is relatively new, you’re probably still experiencing natural house settling. Most homes continue settling for 8 to 12 years after construction, creating stress points that can develop into new cracks.
The Risks of Waiting
I’ve been in this business long enough to see what happens when homeowners think, “It’s just a little crack – I’ll deal with it later.” Trust me, later always costs more.
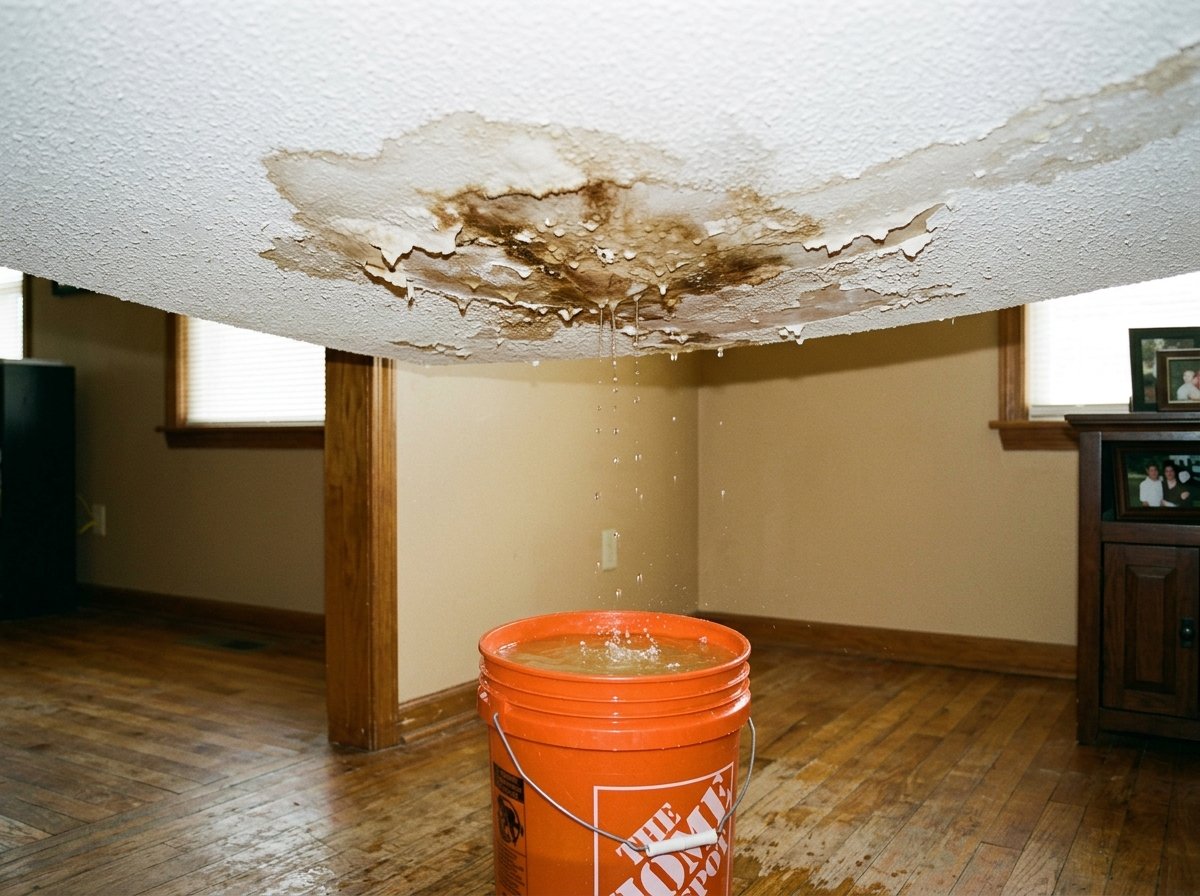
Water seepage starts small but grows fast. That hairline crack might seem harmless until we get one of those Texas gully-washers that dump three inches of rain in an hour.
Once moisture gets in, mold growth follows within 24 to 48 hours. Beyond the musty smell, mold creates serious health risks for your family, especially anyone with asthma or respiratory sensitivities.
Radon gas entry through foundation cracks is invisible and odorless, but it’s the second leading cause of lung cancer in the United States. Cracks provide direct pathways for this dangerous gas to enter your living space.
Your property value takes an immediate hit when potential buyers spot foundation cracks during inspections. Even minor cosmetic issues can knock thousands off your home’s market value or kill a sale entirely.
The math on escalating repair costs is brutal. A basement crack repair that costs $200 today might require $2,000 worth of work next year. I’ve seen delayed repairs turn into complete foundation reconstruction projects costing $15,000 or more.
Spotting Trouble Early: Structural vs Non-Structural Cracks
Here’s the truth about basement cracks: they’re not all created equal. After nearly two decades of foundation work in the Texas Hill Country, I can tell you that learning to spot the difference between a harmless settling crack and a serious structural issue will save you both money and sleepless nights.
The good news? Most cracks fall into the “no big deal” category. The challenge is knowing which ones demand immediate attention.
| Crack Type | Structural | Non-Structural |
|---|---|---|
| Width | Over 1/2 inch wide | Hairline to 1/4 inch |
| Direction | Horizontal, diagonal, stair-stepped | Vertical, slight diagonal |
| Location | Mid-wall, corners, near openings | Random locations |
| Pattern | Jagged, irregular | Straight, clean lines |
| Movement | Active (grows over time) | Stable (no growth) |
| Action Needed | Immediate professional assessment | Monitor and repair as needed |
Structural cracks are the ones that should get your attention fast. These troublemakers typically run horizontally across your wall or create that distinctive stair-stepped pattern you’ll see in block foundations. They’re telling you that something significant is moving – whether it’s soil pressure, foundation settlement, or water damage affecting your home’s stability.
Non-structural cracks, on the other hand, are usually just your concrete’s way of aging gracefully. These typically run vertically and happen as concrete naturally shrinks during the curing process or from minor house settling.
DIY Inspection Checklist
Regular inspections are your best defense against small problems becoming big headaches. I always tell my clients that spending 30 minutes every few months checking their basement can prevent thousands in repair costs later.
Grab these essential tools before you start: a good flashlight or headlamp, measuring tape, your smartphone for photos, and crack monitoring gauges from your local hardware store.
Start by documenting everything. Take clear photos of every crack with a ruler in the shot for scale. This creates a baseline you can compare against during future inspections. Measure the width of each crack at its widest point – this measurement is crucial for determining whether you’re dealing with a structural concern.
Install crack monitoring gauges on any suspicious cracks. These inexpensive tools will tell you definitively whether a crack is growing over time. If the gauge shows movement after a few months, it’s time to call in the professionals.
Check for moisture issues by looking for water stains, those white chalky deposits called efflorescence, or any dampness around cracks. Our Texas storms can really test your foundation’s defenses, and moisture intrusion often shows up around existing cracks first.
Here are the warning signs that require professional assessment: cracks wider than a quarter-inch, any horizontal or stair-stepped patterns, cracks that grow over time, water seepage or dampness, doors and windows that suddenly stick, or floors that seem uneven.
Best Basement Crack Repair Options Reviewed

After helping Texas homeowners fix basement cracks for nearly two decades, I’ve learned that choosing the right repair method makes all the difference between a quick fix and a permanent solution. The good news? Modern basement crack repair techniques are more effective than ever.
Gone are the days when fixing a basement crack meant digging up half your yard. Today’s injection methods work from inside your basement, sealing cracks with materials that are actually stronger than the original concrete.
The secret lies in low-pressure injection systems that push repair materials deep into the crack structure. These materials cure to form a waterproof seal that flexes with your foundation’s natural movement. When done correctly, the repaired area becomes the strongest part of your wall.
Polyurethane foam works like magic on wet cracks – it actually needs moisture to activate properly and can expand up to 35 times its original size. Epoxy resin takes a different approach, creating rock-solid structural bonds that restore your wall’s original strength. Carbon-fiber reinforcement adds an extra layer of protection for walls showing stress patterns.
For homeowners dealing with multiple cracks or structural concerns, our comprehensive crack repair services address both immediate repairs and long-term foundation stability.
DIY Basement Crack Repair Kits
Here’s something that surprises many homeowners: quality basement crack repair kits can deliver professional-level results when used correctly. The key word there is “correctly” – these aren’t your grandfather’s concrete patches.
Modern DIY kits use the same injection principles as professional systems, just scaled down for homeowner use. Cartridge-based urethane systems work with any standard caulk gun you probably already own. The peel-off surface sealers that come with most kits temporarily hold the injection material in place while it cures.
Most quality kits cover 10 to 30 feet of crack depending on the crack width and kit size. The materials cure completely within 24 to 72 hours, though you’ll want to avoid heavy rain during that time if possible.
Safety matters more than you might think with these materials. You’ll need safety glasses and chemical-resistant gloves at minimum. Add a dust mask if you’re doing any grinding or cleaning, and knee pads will save your knees during floor crack repairs.
The biggest difference between DIY success and DIY disaster? Surface preparation. Clean cracks bond better, dry cracks (for epoxy) cure stronger, and following the mixing instructions exactly prevents weak repairs that fail within months.
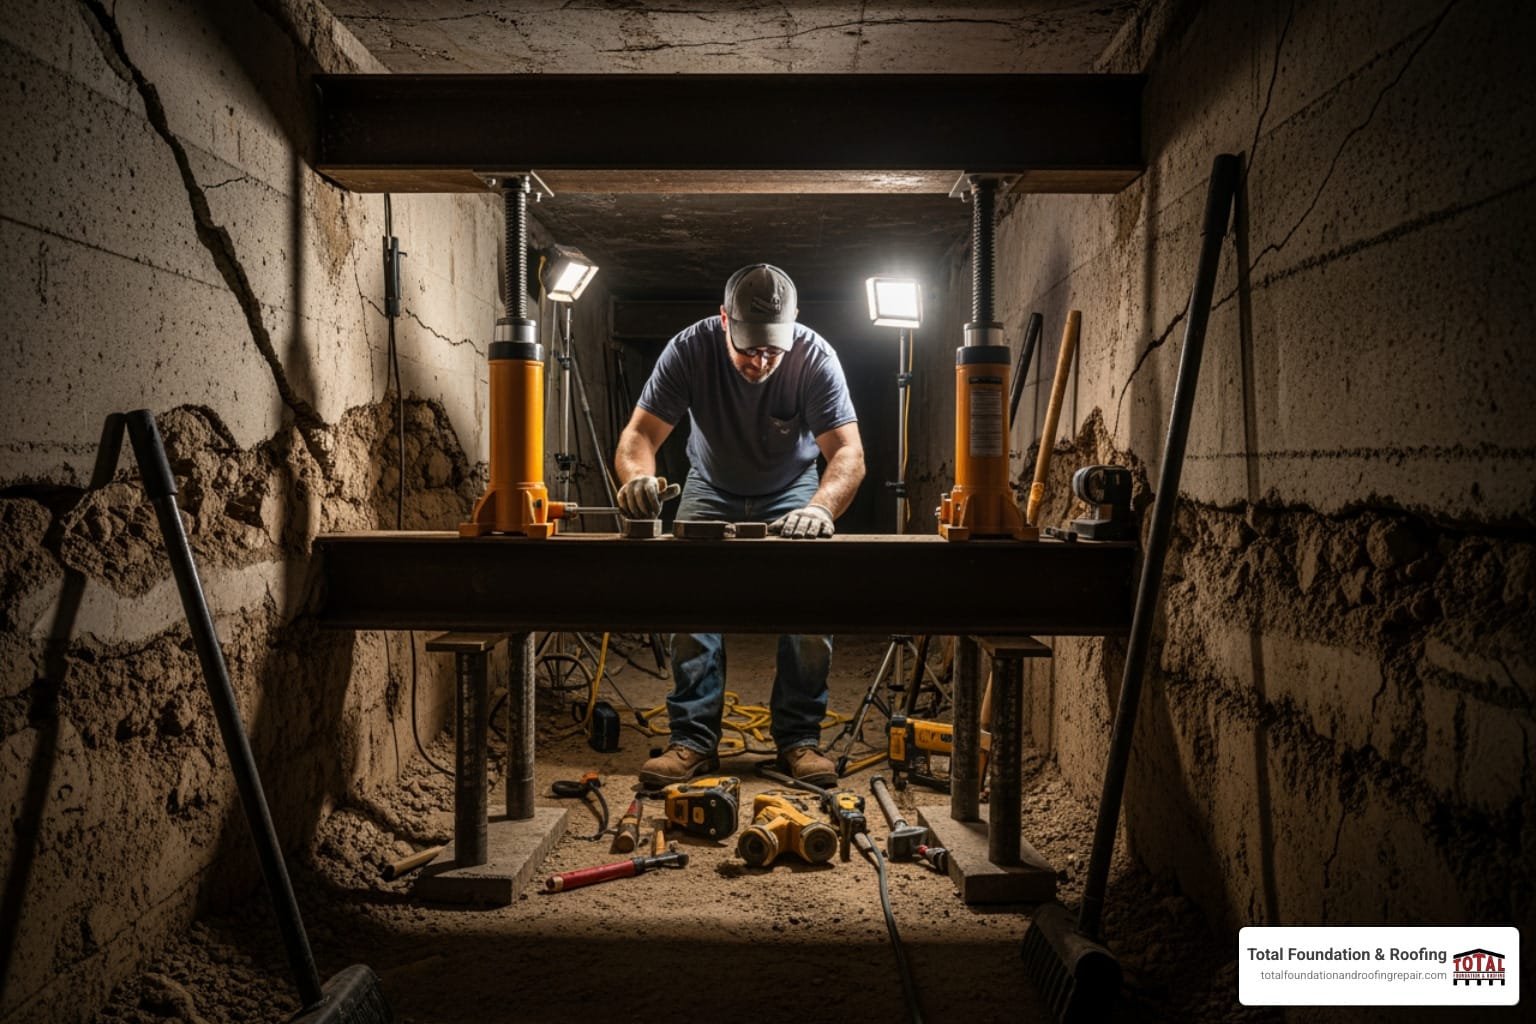
Professional Basement Crack Repair Services
While DIY kits work well for straightforward repairs, professional basement crack repair brings tools and expertise that homeowners simply can’t match. We use commercial-grade injection systems that operate at higher pressures than consumer equipment allows.
Professional repairs start with thorough crack assessment. We’re looking for underlying causes, not just treating symptoms. Sometimes what looks like a simple crack actually indicates foundation movement that needs addressing before any repair will hold long-term.
The low-pressure injection process we use involves installing ports every few inches along the crack, then injecting material from the bottom up. This ensures complete filling without air pockets that could lead to future leaks.
What really sets professional service apart is the lifetime warranty we provide on crack repairs. This transferable coverage protects your investment and gives you peace of mind. When we guarantee our work for life, we make sure it’s done right the first time.
Our foundation repair services include comprehensive crack evaluation and repair with materials and techniques not available to DIY enthusiasts.
When to Choose Epoxy vs Polyurethane
Picking the wrong injection material is like using winter tires in summer – it might work, but you won’t get the performance you need. Epoxy and polyurethane each excel in specific situations.
Epoxy resin creates repairs stronger than the original concrete, but it demands completely dry conditions. Even slight dampness prevents proper bonding, leaving you with a repair that looks good but fails under pressure. When epoxy works correctly, it provides excellent structural bonding and compression strength that actually reinforces your foundation wall.
Polyurethane foam takes the opposite approach – it actually works better on wet cracks because moisture helps activate the curing process. This flexible foam accommodates the natural expansion and contraction that concrete experiences with temperature changes.
For more detailed information about concrete sealant options and applications, Home Depot’s concrete repair guide provides helpful technical specifications and product comparisons.
Many professional repairs use both materials in sequence. We’ll inject polyurethane first to stop water infiltration, then follow with epoxy injection to restore structural integrity.
Dollars & Sense: Costs, Warranties, Life Expectancy

Understanding the financial aspects of basement crack repair helps you make informed decisions about DIY versus professional repairs. While initial costs vary significantly, long-term value often favors professional solutions.
DIY Kit Costs:
- Basic Polyurethane Kits: $75-$135 (covers 10-20 feet)
- Premium Epoxy Systems: $150-$225 (includes multiple components)
- Additional Materials: $25-$50 (surface preparation, safety equipment)
- Total DIY Investment: $100-$275 per repair
Professional Service Costs:
- Interior Crack Injection: $500-$1,500 per crack
- Multiple Crack Repairs: $1,000-$2,500 depending on extent
- Structural Reinforcement: $2,000-$4,000 including carbon fiber
- Comprehensive Foundation Repair: $3,000-$8,000 for major issues
Exterior Excavation Costs:
- Basic Excavation and Sealing: $5,000-$8,000
- Full Perimeter Waterproofing: $8,000-$15,000
- Structural Repairs with Excavation: $10,000-$25,000
Warranty Considerations:
- DIY Repairs: Material warranties only (typically 1-2 years)
- Professional Repairs: Labor and material warranties (10-25 years)
- Transferable Coverage: Professional warranties often transfer to new owners
- Warranty Value: Can add $2,000-$5,000 to home value
Life Expectancy:
- Quality DIY Repairs: 5-10 years with proper application
- Professional Injection: 15-25 years with warranty backing
- Exterior Waterproofing: 20-30 years with proper maintenance
Return on Investment:
A dry, stable basement adds significant value to your home. Professional repairs typically return 80-100% of their cost in increased property value, while preventing costly water damage that can run $10,000-$50,000 or more.
Keep It Crack-Free: Prevention & Maintenance
The best basement crack repair is the one you never have to do. After watching countless homeowners deal with expensive foundation problems, I can tell you that a little prevention goes a long way toward keeping your basement dry and crack-free.
Think of foundation maintenance like brushing your teeth – it’s way easier to prevent problems than fix them later. The good news is that most prevention strategies are simple tasks you can handle yourself with basic tools and a little time.
Proper grading around your foundation is your first line of defense. Walk around your house and check that the soil slopes away from your foundation walls. You want at least a 6-inch drop over the first 10 feet.
Gutter and downspout management might sound boring, but it’s absolutely critical. Clean those gutters at least twice a year – more if you have lots of trees. Extend your downspouts at least 6 feet from the house, and consider splash blocks to direct water even further away.
Your sump pump is like insurance – you hope you never need it, but when you do, it better work. Test it quarterly by pouring a bucket of water into the sump pit.
Humidity control in your basement prevents more than just that musty smell. Keep humidity below 50% using a good dehumidifier. High humidity actually weakens concrete over time and creates perfect conditions for mold growth.
Don’t forget about expansion joint maintenance. These rubber or foam strips between concrete sections allow for natural movement. Keep them clean and replace them when they crack or deteriorate.
Annual inspections should become as routine as changing your air filters. Walk your basement twice a year with a flashlight, documenting any changes in existing cracks or new ones forming.
For homeowners who want comprehensive protection, our foundation waterproofing services address both current moisture issues and long-term prevention strategies.
Seasonal Maintenance Calendar
Texas weather keeps us on our toes, so I’ve developed a seasonal approach that works with our climate patterns.
Spring brings inspection season. March through May is perfect for checking winter damage from those occasional freezes we get in the Hill Country. Clean and test your gutters after the last frost, and fire up that sump pump to make sure it’s ready for spring storms.
Summer means drought watch. Our clay soils can shift dramatically during dry spells, so June through August requires extra attention to soil moisture around your foundation. Check basement humidity levels regularly – your air conditioning creates condensation that can surprise you.
Fall preparation from September through November focuses on getting ready for cooler weather. Clean those gutters again after the leaves fall, and seal any new hairline cracks before winter moisture can get in and freeze.
Winter monitoring keeps things simple. December through February in Texas usually means watching for ice dam formation during our occasional cold snaps. Keep basement temperatures consistent to prevent condensation, and document any crack changes you notice.
Frequently Asked Questions about Basement Crack Repair
After helping Texas homeowners with basement crack repair for nearly two decades, I hear the same questions repeatedly. Let me share the answers that matter most when you’re dealing with foundation cracks.
How long does a crack injection repair last?
This is probably the most important question you can ask – and the answer depends entirely on how the repair is done.
Professional crack injection repairs typically last 15-25 years when executed properly. I’ve personally seen repairs we completed 18 years ago that are still performing perfectly. The secret lies in using professional-grade materials that aren’t available to consumers and applying them with proper high-pressure injection equipment.
DIY repairs using quality materials can last 5-10 years, which makes them surprisingly cost-effective for minor, non-structural cracks. However, there’s a big difference between a repair that works and one that’s guaranteed to work.
Several factors determine how long your repair will last. Material quality makes the biggest difference – professional-grade epoxies and polyurethanes simply outperform consumer products. Installation quality matters just as much, because even the best materials fail without proper surface preparation and injection technique.
Most importantly, repairs last longest when we address the underlying cause of the crack. If poor drainage caused the original problem, fixing just the crack without improving drainage is like putting a bandage on a broken pipe. Environmental conditions like stable soil and good drainage can extend repair life by decades.
Here’s what really sets professional repairs apart: warranty protection. When we guarantee our work for 15-25 years, we’re betting our reputation that the repair will last. That’s confidence you simply can’t get with a DIY approach.
Can the same method fix floor and block-wall cracks?
I wish the answer was yes – it would make life much simpler! Unfortunately, different foundation types require completely different repair approaches.
Floor cracks present unique challenges because concrete slabs experience different stress patterns than walls. The moisture conditions are different, the load distribution is different, and the expansion and contraction patterns are different. Most wall crack repair systems simply won’t work on floor applications.
For floor cracks, we use specialized urethane slab repair systems designed specifically for horizontal surfaces. These systems account for foot traffic, furniture loads, and the way moisture moves through floor slabs.
Block wall cracks are particularly tricky because you’re dealing with multiple pieces of concrete and mortar joints rather than a single monolithic structure. These often require “curtain injection” or “bladder injection” techniques that differ significantly from standard injection methods. The repair material needs to flow through the hollow cores of the blocks and seal all the interconnected spaces.
Poured concrete walls are actually the easiest to repair because they’re monolithic structures. These respond beautifully to both DIY and professional injection techniques, and you get predictable, reliable results.
The bottom line: one size definitely doesn’t fit all when it comes to foundation repairs. This is why proper assessment is so crucial before starting any repair work.
What happens if a previous repair failed?
Don’t worry – you’re not alone, and the situation isn’t hopeless. Failed repairs are actually more common than most people realize, especially with DIY attempts or when contractors use inferior materials.
When we encounter a failed repair, we start with a thorough assessment to understand what went wrong. Was it the wrong materials for the job? Poor surface preparation? Or was there an underlying issue that nobody addressed the first time around?
Removing failed repairs requires patience and the right tools. Failed hydraulic cement patches or inadequate sealants must be completely chipped and ground away to access the original crack. It’s tedious work, but there’s no shortcut if you want a permanent solution.
Here’s where our experience really pays off: root cause analysis. We’ve learned that most repair failures happen because the original repair didn’t address why the crack formed in the first place. Poor drainage, soil problems, or ongoing structural movement will defeat even the best repair materials if left uncorrected.
Once we understand the complete picture, we create a proper repair strategy using professional-grade materials and proven techniques. This isn’t just about filling the crack – it’s about solving the problem permanently.
The best part about working with professionals after a failed repair? Warranty protection. Our repairs include comprehensive warranties that protect against future failures. We’re so confident in our approach that we guarantee the work for decades.
I’ve seen homeowners who attempted three or four DIY repairs before calling us. After we complete the proper repair, they often tell me they wish they’d called us first. While I appreciate the business, I’d rather see people get it right the first time and save themselves the frustration and expense of multiple attempts.
Conclusion
Basement crack repair doesn’t have to keep you up at night when you know what you’re dealing with. After nearly two decades of helping Texas homeowners tackle foundation challenges, I’ve learned that the biggest mistake people make is waiting too long to act.
Here in the Hill Country, our clay soils and wild weather swings don’t give foundations any breaks. What starts as a hairline crack during a dry spell can turn into a major water intrusion problem when the next storm hits. But here’s the good news – you have solid options no matter what your situation looks like.
DIY repairs work great for those minor settling cracks that show up in most basements. A quality polyurethane kit and a weekend afternoon can solve problems that might otherwise turn into expensive headaches. Just remember to be honest about your skill level and the crack’s severity.
Professional repairs make sense when you’re dealing with anything structural, want long-term warranty protection, or simply prefer having experts handle the job right the first time. The peace of mind that comes with a lifetime warranty often pays for itself in reduced stress alone.
At Total Foundation & Roofing, we’ve seen every type of crack imaginable in our Texas Hill Country homes. From tiny shrinkage cracks in new construction to serious structural issues in older properties, we’ve developed solutions that work for our unique conditions. Our approach always starts with understanding what caused the crack in the first place – because fixing symptoms without addressing causes just leads to more problems down the road.
The bottom line is simple: basement crack repair today costs a fraction of what foundation reconstruction costs tomorrow. Whether you tackle it yourself or call in the pros, taking action protects your home’s value and your family’s comfort.
Ready to get those cracks sealed up for good? Give us a call for a no-pressure assessment, or check out our complete foundation repair services to see how we can help keep your home solid and dry for years to come.